I'm dealing with tables and bulk actions quite often when I work on admin panels. And when the project is not based on any frontend framework such as Angular, React or Vue, there is some manual JavaScript work to be done :)
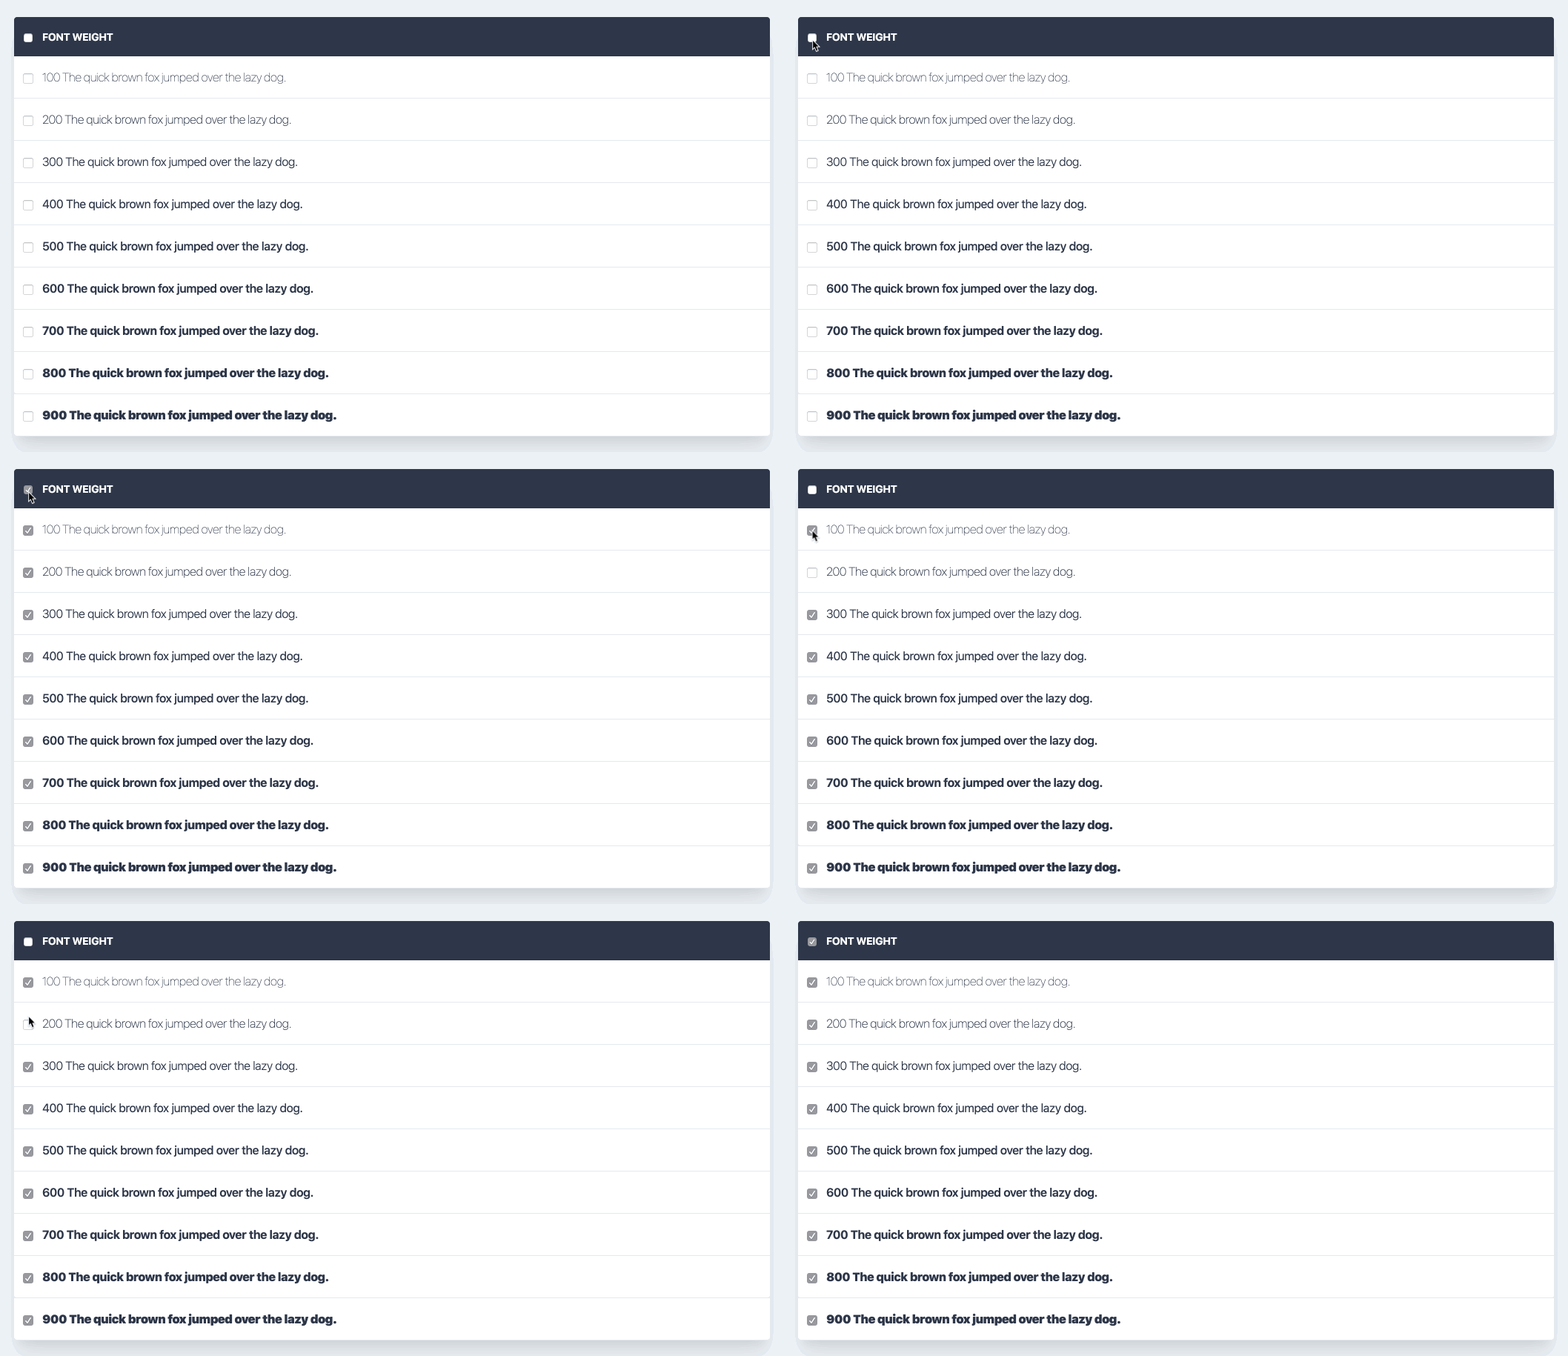
In this post I'll show you how to check/uncheck all checkboxes in a table with one "master" checkbox "to rule them all" ?using modern JavaScript appoach.
Usecase
The usual case scenario is when you have multiple rows which has to be selected at once and then do some bulk actions on them.

The HTML
Let's create a simple table or if you prefer you can use divs, it doens't matter really. Whatever the case is, we need to add some selector on the DOM element which holds the checkboxes so we can select it later in the JavaScript. We'll name it data-checkboxes.
<table data-checkboxes>
</table>
Now let's add the table head with the master checkbox in the first column. We'll add a data attribute to it as well data-master.
<table data-checkboxes>
    <thead>
    <tr>
        <th>
            <input type="checkbox" data-master>
        </th>
        <th>Name</th>
    </tr>
    </thead>
</table>
Next step is to add the table body with rows which contains the "slaves" checkboxes. We'll name their selector data-slave.
<table data-checkboxes>
    <thead>
    <tr>
        <th>
            <input type="checkbox" data-master>
        </th>
        <th>Name</th>
    </tr>
    </thead>
    <tbody>
    <tr>
        <td><input type="checkbox" data-slave></td>
        <td>John Snow</td>
    </tr>
    <tr>
        <td><input type="checkbox" data-slave></td>
        <td>Arya Stark</td>
    </tr>
    <tr>
        <td><input type="checkbox" data-slave></td>
        <td>Sansa Stark</td>
    </tr>
    </tbody>
</table>
The JavaScript
We have everything we need to start working on the JS code now. First let's select our checkboxes group, the master and the slaves checkboxes (note that I'm adding an extra selector input[type=checkbox] just in case if there are some DOM elements with the same data attributes):
const checkboxesGroup = document.querySelector('[data-checkboxes]');
const masterCheckbox = document.querySelector('input[type=checkbox][data-master]');
const checkboxes = document.querySelectorAll('input[type=checkbox][data-slave]');
The next step is to add an event listener. The most efficient way is to add it on the checkboxes group instead of every single checkbox separately (if there are milions of checkboxes there will be milions of event listeners). Then we'll check on what DOM element within our group the click takes place. We are interested in only two type of targets. See the code bellow:
checkboxesGroup.addEventListener('click', function (event) {
    const clickedElement = event.target;

    // We're interested in only 2 types of targets - the 'master' checkbox...
    if (clickedElement === masterCheckbox) {
        // Do stuff here
    }

    // ...or the 'slaves' ones
    if ([...checkboxes].indexOf(clickedElement) === -1) {
        // Don't go further if the clicked element is not a 'slave' checkbox
        return;
    }
});
We are taking advantage of the ECMAScript 6 spread operator here and turn the checkboxes nodeList into an array [...checkboxes]. Then we check if the clicked element is in it. If not, there is no point to go any further in the script (early return).
Let's do the logic if the clicked target is indeed our master checkbox.
if (clickedElement === masterCheckbox) {
    return [...checkboxes].forEach(e => e.checked = clickedElement.checked);
}
We are looping trough all the slaves checkboxes and make their checked status the same as the master checkbox. If the master is checked then all of the slaves will be checked as well. And vise versa. And again we are doing early return - there is no point to go to the next if in the script if the target is the master checkbox.
The final step is to add the logic if the target is one of the slaves checkboxes. The goal is to check/uncheck the master checkbox depending on that if all slaves checkobxes are checked or not.
let allChecked = true;

[...checkboxes].every(e => (allChecked = e.checked));

masterCheckbox.checked = allChecked; // true/false
This may seem a bit complicated at first but it's really simple. Let me explain.
Let's assume that all slave checkboxes are checked let allChecked = true;. Then we are looping trough all checkboxes and if we find at least one that is not checked we break the loop and the allChecked variable is set to false (see the every method syntaxt for referance). We then set the checked property of the master checkbox the same as the outcome of our loop - true/false. If all checkboxes are checked, then the allChecked variable will remain true therefore the master will be checked as well. Pretty simple, right :)
Refactoring
What if there are more than one table/group of checkboxes in our page? We need to do a little refactoring here for our code to be able to work for multiple groups of checkboxes.
First we'll need to select all checkboxes groups:
const checkboxesGroups = document.querySelectorAll('[data-checkboxes]');Then we need to loop trough them and select the master and the slaves checkboxes within the current group:
[...checkboxesGroups].forEach(group => {
    const masterCheckbox = group.querySelector('input[type=checkbox][data-master]');
    const checkboxes = group.querySelectorAll('input[type=checkbox][data-slave]');
});
Now we can add the event listener to the current checkboxes group. The rest is pretty much the same.
Here is the final code:
// Get all checkboxes groups in the page
const checkboxesGroups = document.querySelectorAll('[data-checkboxes]');

[...checkboxesGroups].forEach(group => {
    const masterCheckbox = group.querySelector('input[type=checkbox][data-master]'); // One Checkbox to rule them all...
    const checkboxes = group.querySelectorAll('input[type=checkbox][data-slave]'); // The 'slaves' checkboxes in the current group

    // Add event listener to the table instead to all checkboxes separately.
    group.addEventListener('click', function (event) {
        const clickedElement = event.target;

        // We're interested in only 2 types of targets - the 'master' checkbox...
        if (clickedElement === masterCheckbox) {
            // Make all checkboxes checked state the same as the state of the master checkbox (true/false) and return (don't go to the next 'if')
            return [...checkboxes].forEach(e => e.checked = clickedElement.checked);
        }

        // ...or the 'slaves' ones
        if ([...checkboxes].indexOf(clickedElement) === -1) {
            // Don't go further if the clicked target is not a 'slave' checkbox
            return;
        }

        // Let's assume that all 'slave' checkboxes are checked
        let allChecked = true;

        // Return false and break the loop if it finds a checkbox that is'nt checked
        [...checkboxes].every(e => (allChecked = e.checked));

        // If all of the 'slaves' checkboxes are checked make the 'master' checkbox checked=true as well
        // If at least one 'slave' checkbox is unchecked, then the 'master' is unchecked too
        masterCheckbox.checked = allChecked; // true/false
    });
});
Can this work with labels?
Yes! As long as the lable has the proper for attribute or the checkbox is inside the label.
<input type="checkbox" id="slaveCheckbox1" data-slave>
<label for="slaveCheckbox1">Lorem ipsum</label>

<!-- OR -->

<label><input type="checkbox" data-slave></label>
Clicking on a label triggers a click event on the checkbox as well. The first click (on the label) is ignored by our script but the second one (on the checkbox) is what we need.
Here you can find a working DEMO with some nice TailwindCSS styling.
And the source code.
